

Key takeaways
- How to tie a karate belt properly: a clear 7-step method with a square knot, correct belt length, gi position and fixes for belts that slip or twist.
To tie a karate belt properly, close your gi jacket left over right, place the center of the belt at your navel, wrap it around your waist, cross the ends behind you, bring them to the front and finish with a flat square knot so both ends hang evenly. The belt should sit snugly at the hips, over the jacket, not up at the ribs.
Details differ slightly between styles and schools, and some dojos prefer a double wrap or a specific knot direction. This guide covers a widely taught method, so if your instructor shows a different way, follow that. It draws on general martial arts etiquette and published sizing information, not on a personal review of any belt.
Prerequisites: jacket, belt length and posture
Before you tie anything, set up the uniform. Put on the pants, then the jacket, and close it with the left lapel over the right so the right side lies against your body. Keep the jacket flat, tuck any loose fabric flat and stand with your feet about shoulder-width apart.
Check the belt size. It should wrap around your waist twice and leave two ends that hang a hand’s length or more below the knot. If you can wrap it only once with little to spare, it is probably too short. Sizing is tied to height, and charts vary by brand, so check current specifications for your style.
A good belt is firm, not slick. A very soft, thin belt can slide loose, while a stiff, new belt needs a few weeks of wear before it ties neatly. Both are normal.
Step-by-step: the standard method
- Find the middle. Hold the belt with both hands and slide until both ends are about the same length.
- Place the center at your navel. The belt should lie flat across your stomach, over the jacket, with no twists.
- Wrap around your back. Take both ends around your waist, cross them behind you and bring them to the front.
- Make the second wrap. Cross the ends over each other in front, take them around your back once more and return to the front. You now have two layers of belt across your stomach.
- Layer the ends. With the ends in front, slip one end up and under both layers of belt across your stomach, then bring it down over the other end.
- Pull it snug. Pull the ends away from each other until the belt sits firmly but allows you to breathe and bend.
- Finish with a square knot. Tie left over right, then right over left, and pull both ends. The knot should lie flat.
When done correctly, the belt looks the same on the left and right and the knot sits flat at the front.
Why the square knot matters
A square knot, also called a reef knot, is flat and holds under sideways pull. The version where you repeat “left over right” twice makes a granny knot, which sits crooked and tends to slip. The easy way to remember the correct pattern is to alternate: left over right, then right over left.
After tying, check the knot. If it sits at an angle or one end points sideways, it is likely a granny knot. Untie it and begin again. Some schools teach a slightly different finish, such as passing one end under the wraps before the knot, which can add friction. Either way, the knot should be flat, centered and firm.
Common mistakes and quick fixes
| Problem | Likely cause | Fix |
|---|---|---|
| Belt slips down | Wraps too loose or belt too slick | Tighten wraps; use a snug fit at the hips |
| Knot comes undone | Granny knot | Tie left over right, then right over left |
| Ends are uneven | Belt not centered at the start | Slide the knot sideways before tightening |
| Belt twists | Folds in the fabric | Flatten each wrap before pulling |
| Belt rides up | Worn too high on the ribs | Lower it to the hip bones |
| Jacket gapes | Lapels not closed correctly | Re-close left over right, then retie |
Most issues come from skipping the first adjustment. A few seconds spent flattening the belt before pulling it tight usually saves repeated retying mid-class.
A worked example: tying between drills
Suppose your belt loosens during a warm-up and your instructor gives you a short break. Stand away from the line, face the wall, and untie the knot. Re-center the belt, wrapping it twice, and check that both ends match in length before you cross them. Pull each wrap tight, tie the square knot and then pull both ends firmly. The whole process takes about 20 to 30 seconds with practice. Beginners often take longer for the first month, and that is fine.
Etiquette and care for the belt
In many dojos the belt is more than clothing. It reflects rank and time spent in training, so it is usually handled with respect. Avoid letting it touch the floor, do not use it as a rope or toy, and keep it with your uniform rather than tossing it into a bag. Rules differ between schools, so ask your instructor about washing and ceremony.
If washing is allowed, use cool water and mild soap, then air dry flat. Machine washing can fray edges and cause color to run. Colored belts may bleed onto the white jacket when wet.
A first-week practice checklist
Tying becomes automatic with repetition, so practice at home before class. Use this simple plan for the first week.
- Day 1 to 2: tie and untie the belt ten times, checking that the center starts at the navel.
- Day 3 to 4: tie it in front of a mirror and compare the left and right end lengths.
- Day 5: tie it with your eyes closed, then check that the knot is flat and centered.
- Day 6 to 7: time yourself and aim for under 30 seconds with a snug fit.
Children often learn faster by saying the steps aloud. Keep the belt dry during practice and never leave it in a damp gym bag, where it can mildew.
When to stop and ask your instructor
If your belt keeps slipping despite careful tying, ask your instructor to look at it. They can check the length, the fit of the jacket and whether a different wrap suits your body. Stop and fix the belt before drills involving throws, grappling or partner work, since a loose belt can catch a partner’s hand. Children should be helped by an adult or instructor, and any loose, long belt ends should be tucked or shortened. Never tie a belt so tight that it restricts breathing.
Related guides
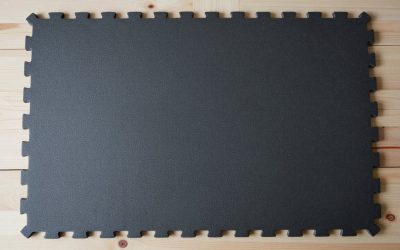
- Puzzle Foam Mats For Home Karate Practice
- Century Martial Arts Karate Sparring Gear
- How To Wash A Karate Gi Without Shrinking It
Frequently asked questions
Which side goes over when closing the gi jacket?
In traditional karate practice the left side of the jacket is placed over the right, so the right lapel sits against the body. The reverse is traditionally associated with dressing the deceased in several cultures, so dojo etiquette treats it as an error. Close the jacket first, then tie the belt over it so the lapels stay flat and secure.
How long should a karate belt be?
A common rule is that the belt should wrap around the waist about twice with enough left over for a knot and two ends hanging roughly a hand’s length or more. Sizing charts vary by brand and style, so check current specifications. Too short a belt will not tie securely, and too long a belt trips you and tangles.
Why does a karate belt keep coming undone?
The most frequent causes are a knot tied the wrong way, which makes a granny knot instead of a square knot, a belt with a slick or worn surface, and wraps that are too loose. Tighten the wraps before tying, finish with a square knot and pull both ends firmly. Ask your instructor to check your technique.
Should the belt ends be the same length?
Yes, aim for equal ends that hang naturally, often about a hand or two below the knot, but follow your dojo’s preference. Uneven ends look untidy and can pull the knot loose. Adjust by sliding the knot sideways before tightening, and trim loose threads only if your school allows it.
Is it fine to wash the belt?
Many dojos advise against washing a belt often, since it symbolizes training time, and some traditions leave it unwashed altogether. Others permit gentle spot cleaning with mild soap and cool water. Rough washing can fray the edges or shrink the fabric. Follow the guidance of your instructor and the care tag, and air dry flat.




Write Your Review
No reviews yet. Be the first to share your experience!